Enable HTTPS บน Apache ด้วย Self Signed Certificate
HTTPS (Hypertext Transfer Protocol Secure) คือโปรโตคอลการสื่อสารอินเทอร์เน็ตที่ช่วยรักษาความสมบูรณ์ถูกต้องของข้อมูลผู้ใช้และเก็บข้อมูลไว้เป็นความลับระหว่างคอมพิวเตอร์ของผู้ใช้กับเว็บไซต์
ผู้ใช้คาดหวังประสบการณ์ออนไลน์ที่มีความปลอดภัยและเป็นส่วนตัวระหว่างที่ใช้เว็บไซต์ เราขอแนะนำให้คุณใช้ HTTPS เพื่อปกป้องการเชื่อมต่อของผู้ใช้กับเว็บไซต์ ไม่ว่าเนื้อหาในเว็บไซต์จะเป็นรูปแบบใดก็ตาม
สามารถอ่านต่อได้ที่ https://support.google.com/webmasters/answer/6073543?hl=th
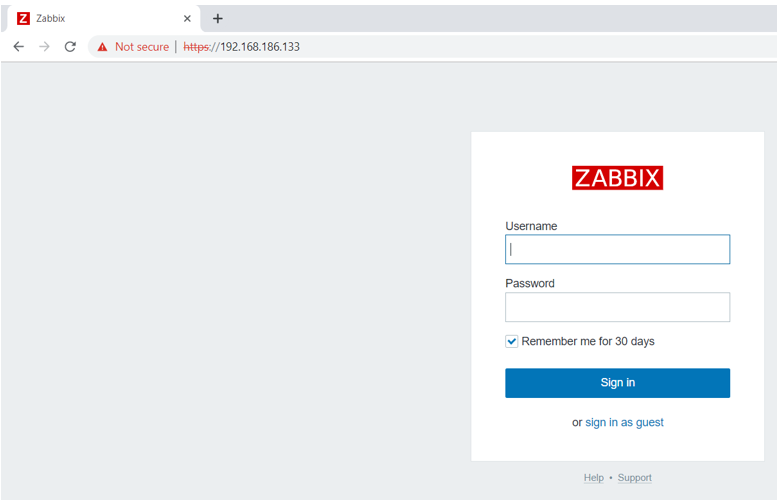
ซึ่งหลังจากที่เราได้ติดตั้ง Zabbix ไปแล้วทุกท่านจะทราบว่า Zabbix จะวิ่งด้วย http ซึ่งถ้าเราจะเปิดให้เข้าจาก public ได้เราควร enable https ก่อนครับ เรามาดูกันดีกว่า ว่าเราจะสามารถ enable HTTPS บน Zabbix ของเราได้อย่างไร
อย่างแรกต้องเข้าใจก่อนว่า Zabbix ของเราใช้ web service ของอะไร ในที่นี้ของผมใช้ Apache ครับ
1) Login ด้วย root
# su root
2) เราจะติดตั้ง service เพิ่ม mod_ssl เพิ่มเติมก่อนครับ
[root@localhost ~]# yum install -y mod_ssl
3) สร้าง folder สำหรับ เก็บ private key
[root@localhost ~]# mkdir /etc/ssl/private
4) เปลี่ยน permission ให้ user root สามารถเข้าถึง folder ได้อย่างเดียว
[root@localhost ~]# chmod 700 /etc/ssl/private
5) ต่อไปเราจะ Generate cert ของเรา ถ้าอยากปรับ parameter สามารถดูข้อมูลตามข้างล่างได้ครับ
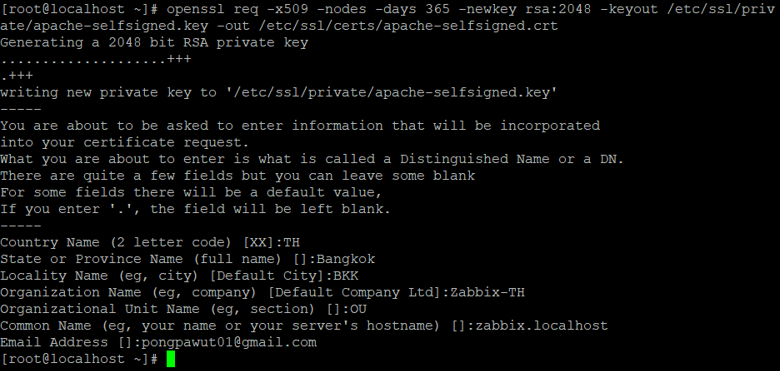
[root@localhost ~]# openssl req -x509 -nodes -days 365 -newkey rsa:2048 -keyout /etc/ssl/private/apache-selfsigned.key -out /etc/ssl/certs/apache-selfsigned.crt
Country Name : ชื่อย่อที่ตั้งประเทศ ขององค์กรเจ้าของโดเมนที่จดทะเบียนถูกต้องตามกฎหมาย กรณีประเทศไทยใช้ TH
State or Province Name : ชื่อที่ตั้งจังหวัด ขององค์กรเจ้าของโดเมนที่จดทะเบียนถูกต้องตามกฎหมาย
Locality Name : ชื่อเขต อำเภอ ขององค์กรเจ้าของโดเมนที่จดทะเบียนถูกต้องตามกฎหมาย
Organization Name : ชื่อองค์กรเจ้าของโดเมนที่จดทะเบียนถูกต้องตามกฎหมาย
Organizational Unit Name : ชื่อหน่วยงานที่รับผิดชอบ เช่น IT Common name: ชื่อโดเมนจริงที่ต้องการใช้งาน SSL
E-mail Address : ใส่ email account ของผู้ดูแล SSL ของเจ้าของโดเมน
6) ต่อไปเราจะมาสร้าง Diffie-Hellman group จาก PFS (อาจจะใช้เวลามากหน่อยครับ)
[root@localhost ~]# openssl dhparam -out /etc/ssl/certs/dhparam.pem 2048
7) ซึ่งตอนแรก apache-selfsigned.crt จะยังไม่มี Parameter เราจะใช้คำสั่งทางด้านล่างเพื่อ Copy ข้อมูลไปต่อท้าย
[root@localhost ~]# cat /etc/ssl/certs/dhparam.pem | sudo tee -a /etc/ssl/certs/apache-selfsigned.crt
8) เราจะทำการแก้ไข ssl.conf ตามด้านล่างนี้ครับ
[root@localhost ~]# nano /etc/httpd/conf.d/ssl.conf
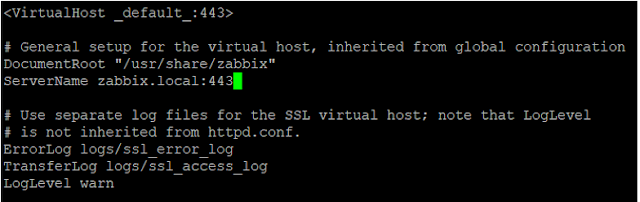
9) แก้ไขข้อมูลตามด้านล่างนี้ครับ
<VirtualHost _default_:443>
DocumentRoot “/usr/share/zabbix” #(DocumentRoot ผมแก้ไขให้ index ไปเรียก Path ของ Zabbix)
ServerName zabbix.local:443
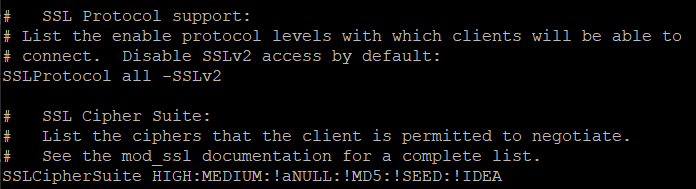
# SSL Protocol support:
# List the enable protocol levels with which clients will be able to
# connect. Disable SSLv2 access by default:
SSLProtocol all -SSLv2
# SSL Cipher Suite:
# List the ciphers that the client is permitted to negotiate.
# See the mod_ssl documentation for a complete list.
SSLCipherSuite HIGH:MEDIUM:!aNULL:!MD5:!SEED:!IDEA
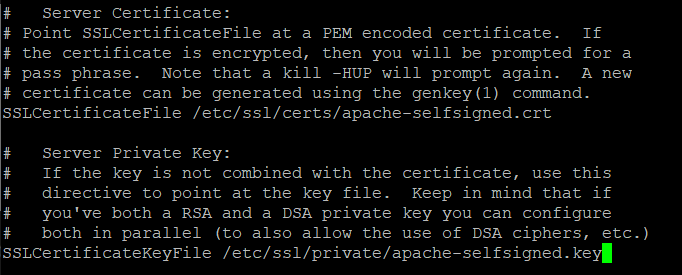
# Server Certificate:
# Point SSLCertificateFile at a PEM encoded certificate. If
# the certificate is encrypted, then you will be prompted for a
# pass phrase. Note that a kill -HUP will prompt again. A new
# certificate can be generated using the genkey(1) command.
SSLCertificateFile /etc/ssl/certs/apache-selfsigned.crt
# Server Certificate:
# Point SSLCertificateFile at a PEM encoded certificate. If
# the certificate is encrypted, then you will be prompted for a
# pass phrase. Note that a kill -HUP will prompt again. A new
# certificate can be generated using the genkey(1) command.
SSLCertificateKeyFile /etc/ssl/private/apache-selfsigned.key
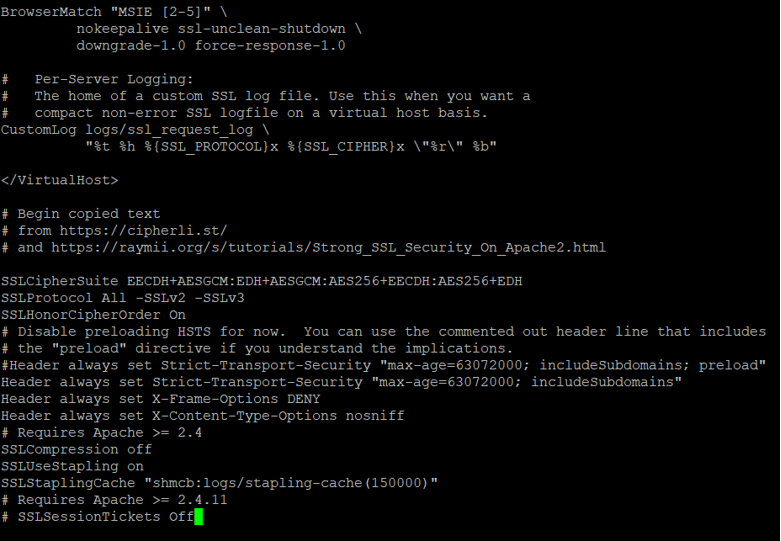
10) Copy text ด้านล่างนี้ไปวางหลัง </VirtualHost>
</VirtualHost>
# Begin copied text
# from https://cipherli.st/
# and https://raymii.org/s/tutorials/Strong_SSL_Security_On_Apache2.html
SSLCipherSuite EECDH+AESGCM:EDH+AESGCM:AES256+EECDH:AES256+EDH
SSLProtocol All -SSLv2 -SSLv3
SSLHonorCipherOrder On
# Disable preloading HSTS for now. You can use the commented out header line that includes
# the “preload” directive if you understand the implications.
#Header always set Strict-Transport-Security “max-age=63072000; includeSubdomains; preload”
Header always set Strict-Transport-Security “max-age=63072000; includeSubdomains”
Header always set X-Frame-Options DENY
Header always set X-Content-Type-Options nosniff
# Requires Apache >= 2.4
SSLCompression off
SSLUseStapling on
SSLStaplingCache “shmcb:logs/stapling-cache(150000)”
# Requires Apache >= 2.4.11
# SSLSessionTickets Off
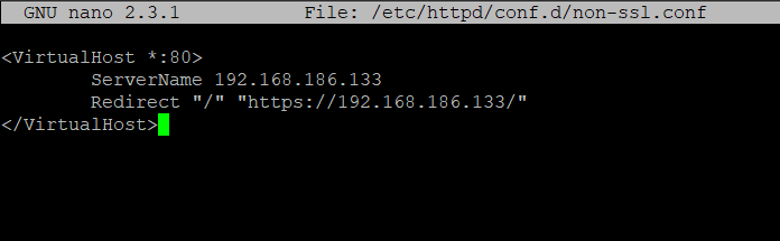
11) ต่อไปเราจะมี redirect http ไปเป็น https ให้ Copy ข้อความทางด้านบ่างแล้วนำไปแก้เป็น IP Zabbix ของท่าน
[root@localhost ~]# nano /etc/httpd/conf.d/non-ssl.conf
<VirtualHost *:80>
ServerName 192.168.186.133
Redirect “/” “https://192.168.186.133/”
</VirtualHost>
12) ให้เราทำการเทส config จาก Apache ครับ จะต้องมีคำว่า
Syntax OK

13) restart service Apache
[root@localhost ~]# systemctl restart httpd
14) ลองเข้า Server zabbix ของเราเป็น http จะกลายเป็น https ครับ