วิธีการติดตั้ง Zabbix V 4.4.4 บน CentOS 7 ภายในเวลา 10 นาที
ในนามของสมาชิกใหม่ วันนี้ผมขอนำเสนอบทความเกี่ยวกับการติดตั้ง Zabbix Version V 4.4.4 ในแบบฉบับที่สั้นๆ และสามารถติดตั้งเสร็จได้ภายใน 10 นาที สิ่งที่ต้องมีและติดตั้งให้เรียบร้อย คือระบบปฏิบัติการ CentOS 7
CentOS-7-x86_64-Minimal-1908
http://mirror.ku.ac.th/centos-cd-dvd/CentOS-7-x86_64-Minimal-1908.iso
หลังติดตั้ง CentOS 7 และทำการเปิดเครื่องขึ้นมาได้เรียบร้อยแล้ว
ขั้นตอนที่ 1 ให้ทำการการปิด SELinux ลง เราต้องแก้ไขไฟล์คอนฟิกของ SELinux เพื่อปิดการทำงาน โดยแก้ไขที่ไฟล์ /etc/sysconfig/selinux
[root@zabbix ~]# vi /etc/sysconfig/selinux
# This file controls the state of SELinux on the system.
# SELINUX= can take one of these three values:
#     enforcing - SELinux security policy is enforced.
#     permissive - SELinux prints warnings instead of enforcing.
#     disabled - No SELinux policy is loaded.
SELINUX=disabled
# SELINUXTYPE= can take one of three values:
#     targeted - Targeted processes are protected,
#     minimum - Modification of targeted policy. Only selected processes are protected.
#     mls - Multi Level Security protection.
SELINUXTYPE=targeted
แก้ไขตรง “SELINUX=enforcing” to “SELINUX=disabled” หลังจากนั้น ให้ บันทึกแล้ว Restart เครื่อง 1 ครั้ง
ขั้นตอนที่ 2 ให้ทำการ Update CentOS7 ก่อนทำการติดตั้ง Zabbix ด้วยคำสั่ง
[root@zabbix ~]# yum -y update
Loaded plugins: fastestmirror Loading mirror speeds from cached hostfile
* base: mirrors.hosting.in.th
* extras: mirrors.hosting.in.th
* updates: mirrors.hosting.in.th
Resolving Dependencies
--> Running transaction check
---> Package ca-certificates.noarch 0:2018.2.22-70.0.el7_5 will be updated
...
... Updated:
nss-softokn.x86_64 0:3.44.0-8.el7_7
nss-softokn-freebl.x86_64 0:3.44.0-8.el7_7
nss-sysinit.x86_64 0:3.44.0-7.el7_7
nss-tools.x86_64 0:3.44.0-7.el7_7
nss-util.x86_64 0:3.44.0-4.el7_7
numactl-libs.x86_64 0:2.0.12-3.el7_7.1
python-perf.x86_64 0:3.10.0-1062.9.1.el7
selinux-policy.noarch 0:3.13.1-252.el7_7.6
selinux-policy-targeted.noarch 0:3.13.1-252.el7_7.6
util-linux.x86_64 0:2.23.2-61.el7_7.1
Complete!
[root@zabbix ~]# reboot
ขั้นตอนที่ 3 หลังจาก Reboot ให้ทำการ ติดตั้ง Zabbix repository ด้วยคำสั่ง
# rpm -Uvh https://repo.zabbix.com/zabbix/4.4/rhel/7/x86_64/zabbix-release-4.4-1.el7.noarch.rpm
[root@zabbix ~]# rpm -Uvh https://repo.zabbix.com/zabbix/4.4/rhel/7/x86_64/zabbix-release-4.4-1.el7.noarch.rpm
Retrieving https://repo.zabbix.com/zabbix/4.4/rhel/7/x86_64/zabbix-release-4.4-1.el7.noarch.rpm
warning: /var/tmp/rpm-tmp.M6C21K: Header V4 RSA/SHA512 Signature, key ID a14fe591: NOKEY
Preparing...                          ################################# [100%]
Updating / installing...
   1:zabbix-release-4.4-1.el7         ################################# [100%]
ขั้นตอนที่ 4 ติดตั้ง MariaDB, Zabbix Server, Frontend, Agent ด้วยคำสั่ง
# yum install mariadb-server zabbix-server-mysql zabbix-web-mysql zabbix-agent
[root@zabbix ~]# yum install mysql zabbix-server-mysql zabbix-web-mysql zabbix-agent
Loaded plugins: fastestmirror
Loading mirror speeds from cached hostfile
 * base: mirrors.hosting.in.th
 * extras: mirrors.hosting.in.th
 * updates: mirrors.hosting.in.th
Resolving Dependencies
--> Running transaction check
---> Package mariadb.x86_64 1:5.5.64-1.el7 will be installed
...
...
  php-gd.x86_64 0:5.4.16-46.1.el7_7         php-ldap.x86_64 0:5.4.16-46.1.el7_7           php-mbstring.x86_64 0:5.4.16-46.1.el7_7
  php-mysql.x86_64 0:5.4.16-46.1.el7_7      php-pdo.x86_64 0:5.4.16-46.1.el7_7            php-xml.x86_64 0:5.4.16-46.1.el7_7
  t1lib.x86_64 0:5.1.2-14.el7               unixODBC.x86_64 0:2.3.1-14.el7                zabbix-web.noarch 0:4.4.4-1.el7

Complete!
ขั้นตอนที่ 5 ทำการ config mariadb ด้วยคำสั่ง
# systemctl start mysqld # คำสั่งสำหรับ start database MariaDB
# systemctl enable mariadb # คำสั่งสำหรับกำหนดให้ start database MariaDB ทุกครั้งหากเครื่องมีการ Reboot
# systemctl status mariadb # คำสั่งสำหรับตรวจสอบว่า database MariaDB ทำงานอยู่หรือไม่
[root@zabbix ~]# [root@zabbix ~]# systemctl start mysqld [root@zabbix ~]# [root@zabbix ~]# systemctl enable mariadb [root@zabbix ~]# [root@zabbix ~]# systemctl status mariadb — mariadb.service - MariaDB database server Loaded: loaded (/usr/lib/systemd/system/mariadb.service; enabled; vendor preset: disabled) Active: active (running) since Fri 2019-12-20 16:23:17 +07; 14s ago Main PID: 9752 Group: /system.slice/mariadb.service /bin/sh /usr/bin/mysqld_safe --basedir=usr/libexec/mysqld --basedir=/usr --datadir=/var/lib/mysql --plugin-dir=/usr/lib64/mysql/plugin --log-error=/v... Dec 20 16:23:15 zabbix mariadb-prepare-db-dir[9666]: MySQL manual for more instructions. Dec 20 16:23:15 zabbix mariadb-prepare-db-dir[9666]: Please report any problems at http://mariadb.org/jira Dec 20 16:23:15 zabbix mariadb-prepare-db-dir[9666]: The latest information about MariaDB is available at http://mariadb.org/. Dec 20 16:23:15 zabbix mariadb-prepare-db-dir[9666]: You can find additional information about the MySQL part at: Dec 20 16:23:15 zabbix mariadb-prepare-db-dir[9666]: http://dev.mysql.com Dec 20 16:23:15 zabbix mariadb-prepare-db-dir[9666]: Consider joining MariaDB's strong and vibrant community: Dec 20 16:23:15 zabbix mariadb-prepare-db-dir[9666]: https://mariadb.org/get-involved/ Dec 20 16:23:16 zabbix mysqld_safe[9752]: 191220 16:23:16 mysqld_safe Logging to '/var/log/mariadb/mariadb.log'. Dec 20 16:23:16 zabbix mysqld_safe[9752]: 191220 16:23:16 mysqld_safe Starting mysqld daemon with databases from /var/lib/mysql Dec 20 16:23:17 zabbix systemd[1]: Started MariaDB database server.
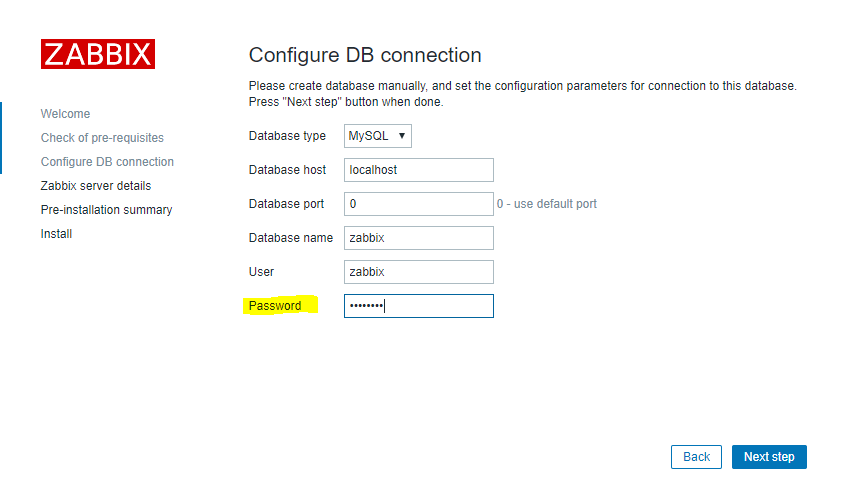
ขั้นตอนที่ 6 ทำการสร้าง database สำหรับ Zabbix Server ด้วยคำสั่ง
# mysql # คำสั่งติดต่อเข้า database MariaDB โดยในค่าเริ่มต้นจะไม่มี password สำหรับ login
MariaDB [(none)]> create database zabbix character set utf8 collate utf8_bin;
MariaDB [(none)]> grant all privileges on zabbix.* to zabbix@localhost identified by ‘password’;
MariaDB [(none)]> quit;
[root@zabbix ~]# mysql
Welcome to the MariaDB monitor.  Commands end with ; or \g.
Your MariaDB connection id is 3
Server version: 5.5.64-MariaDB MariaDB Server

Copyright (c) 2000, 2018, Oracle, MariaDB Corporation Ab and others.

Type 'help;' or '\h' for help. Type '\c' to clear the current input statement.

MariaDB [(none)]> create database zabbix character set utf8 collate utf8_bin;
Query OK, 1 row affected (0.00 sec)

MariaDB [(none)]> grant all privileges on zabbix.* to zabbix@localhost identified by 'password';
Query OK, 0 rows affected (0.00 sec)

MariaDB [(none)]> quit;
Bye
ขั้นตอนที่ 7 ทำการ Import schema และ data ของ Zabbix Server
ด้วยคำสั่ง ด้วย user zabbix และ password ที่เราตั้งไว้ตอนสร้าง Database
ด้วยคำสั่ง
# zcat /usr/share/doc/zabbix-server-mysql*/create.sql.gz | mysql -uzabbix -ppassword zabbix
[root@zabbix ~]# zcat /usr/share/doc/zabbix-server-mysql*/create.sql.gz | mysql -uzabbix -ppassword zabbix
ขั้นตอนที่ 8 ทำการแก้ไขไฟล์ config zabbix server ด้วยคำสั่ง
# vi /etc/zabbix/zabbix_server.conf
ค้นหาคำว่า DBPassword= ให้เอาเครื่องหมาย # ออก แล้วใส่รหัสผ่านของ user zabbix ในที่นี้คือ password แล้วทำการบันทึก
#DBPassword= เปลี่ยนเป็น DBPassword=password
[root@zabbix ~]# vi /etc/zabbix/zabbix_server.conf
### Option: DBPassword
#       Database password.
#       Comment this line if no password is used.
#
# Mandatory: no
# Default:
DBPassword=password
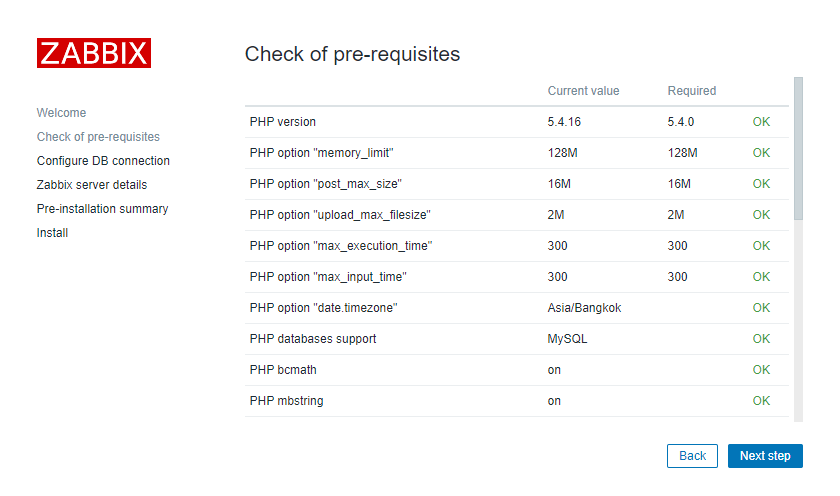
ขั้นตอนที่ 9 ทำการแก้ไขไฟล์ config php web zabbix ด้วยคำสั่ง
# vi /etc/httpd/conf.d/zabbix.conf
ให้เอาเครื่องหมาย # php_value date.timezone Europe/Riga ออก แล้วเปลี่ยน timezone เป็น Asia/Bangkok แล้วทำการบันทึก
#DBPassword= เปลี่ยนเป็น DBPassword=password
[root@zabbix ~]# vi /etc/zabbix/zabbix_server.conf

        php_value max_execution_time 300
        php_value memory_limit 128M
        php_value post_max_size 16M
        php_value upload_max_filesize 2M
        php_value max_input_time 300
        php_value max_input_vars 10000
        php_value always_populate_raw_post_data -1
        php_value date.timezone Asia/Bangkok
ขั้นตอนที่ 10 ทำการ start apache , zabbix server และ zabbix agent ด้วยคำสั่ง
# systemctl start zabbix-server zabbix-agent httpd # Start Apache , Zabbix server และ Zabbix agent
# systemctl enable zabbix-server zabbix-agent httpd # กำหนดให้ Start Apache , Zabbix server และ Zabbix agent ทุกครั้งที่ Reboot
[root@zabbix ~]# systemctl start zabbix-server zabbix-agent httpd
[root@zabbix ~]# systemctl enable zabbix-server zabbix-agent httpd
Created symlink from /etc/systemd/system/multi-user.target.wants/zabbix-server.service to /usr/lib/systemd/system/zabbix-server.service.
Created symlink from /etc/systemd/system/multi-user.target.wants/zabbix-agent.service to /usr/lib/systemd/system/zabbix-agent.service.
Created symlink from /etc/systemd/system/multi-user.target.wants/httpd.service
ขั้นตอนที่ 11 ทำการเปืดให้ firewall อนุญาต port สำหรับ Apache(80) Zabbix(10050,10051) ด้วยคำสั่ง
firewall-cmd –permanent –add-port=10050/tcp
firewall-cmd –permanent –add-port=10051/tcp
firewall-cmd –permanent –add-port=80/tcp
firewall-cmd –permanent –add-service=http
firewall-cmd –permanent –add-service=https
firewall-cmd –reload
[root@zabbix ~]# firewall-cmd --permanent --add-port=10050/tcp success
[root@zabbix ~]# firewall-cmd --permanent --add-port=10051/tcp success
[root@zabbix ~]# firewall-cmd --permanent --add-port=80/tcp success
[root@zabbix ~]# firewall-cmd --reload success
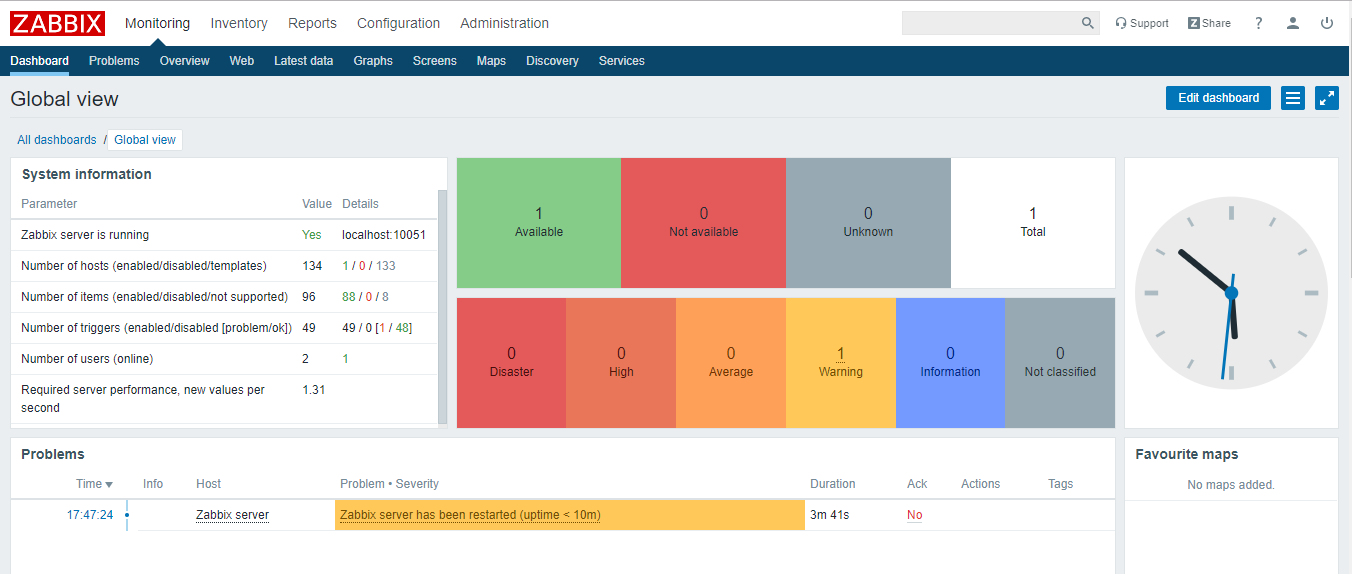
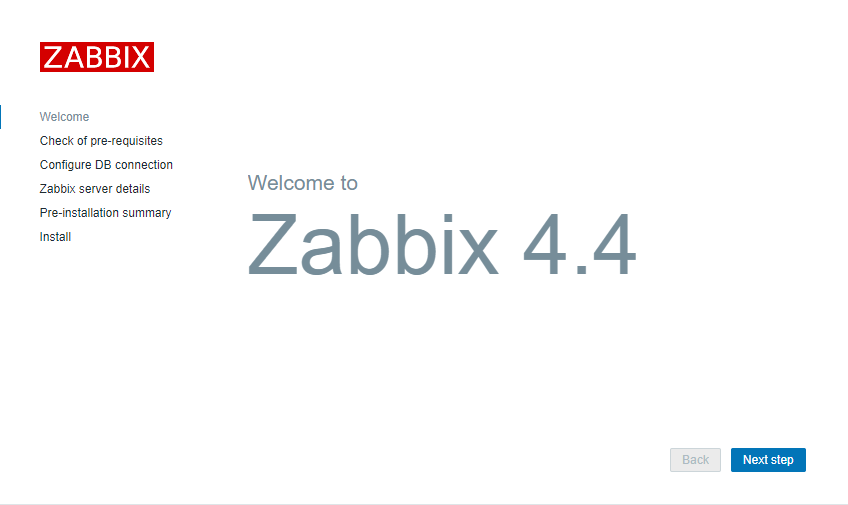
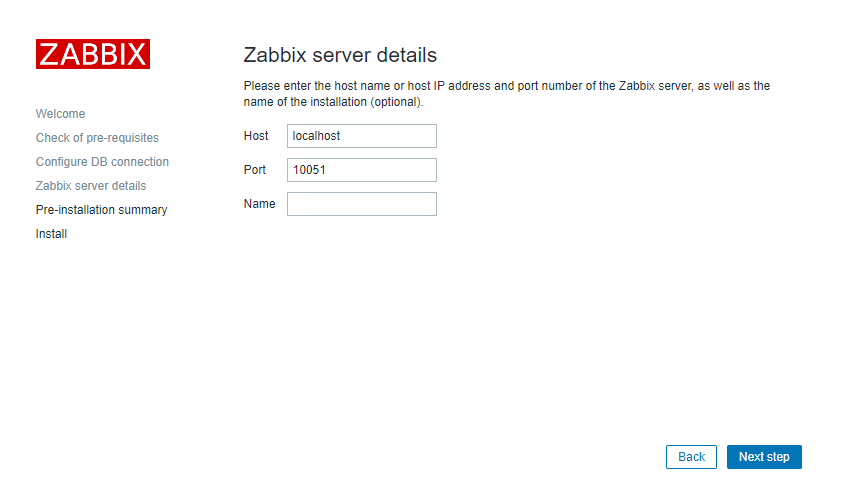
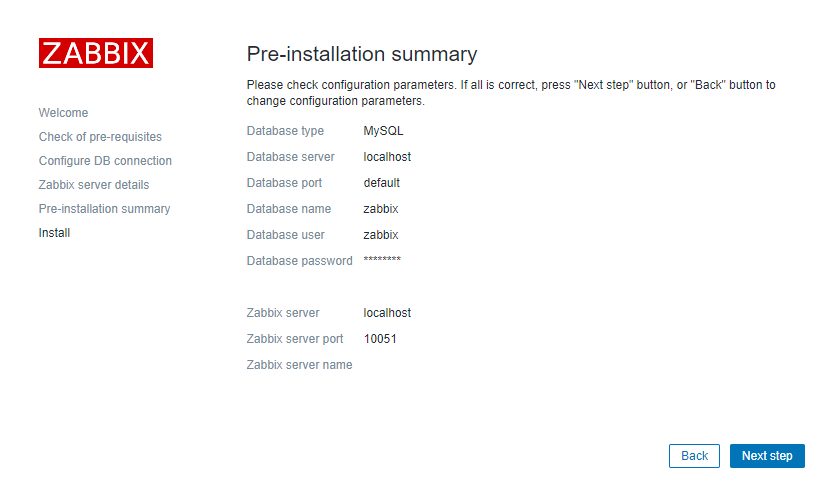
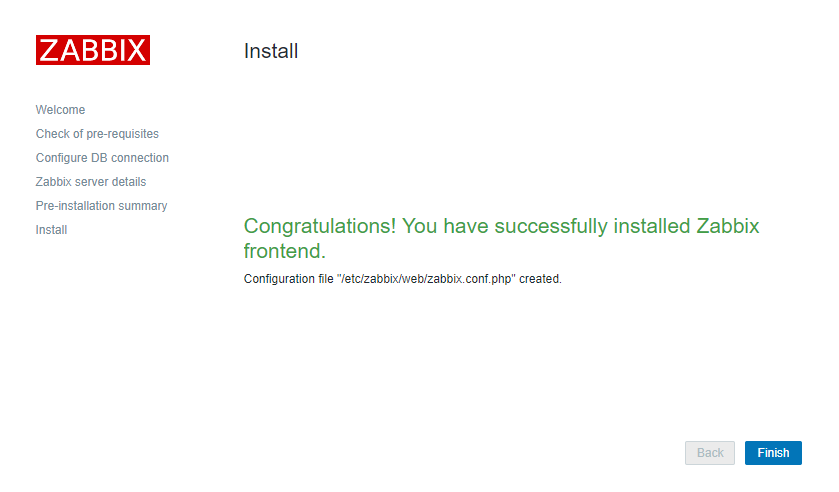
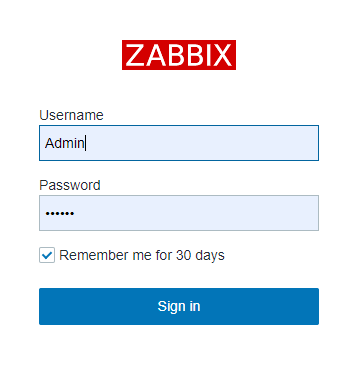
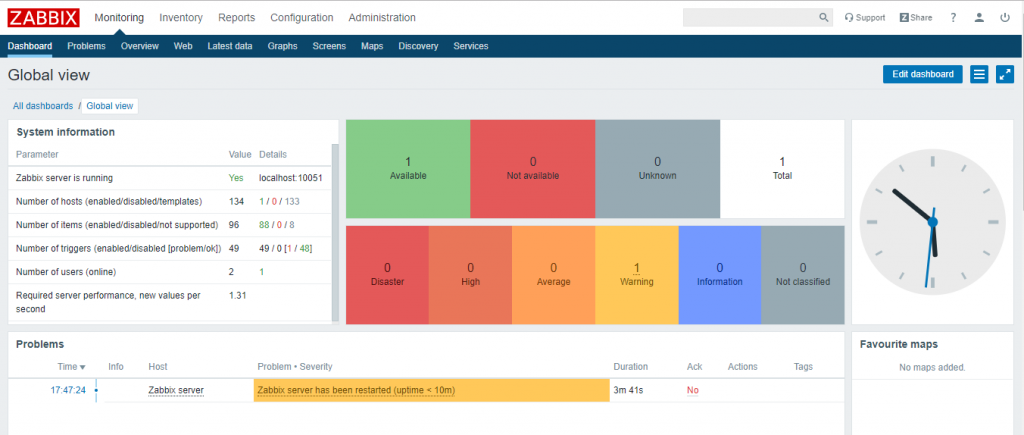
ขั้นตอนที่ 12 กำหนดค่าเริ่มต้นของ Zabbix Web Frontend
ให้เข้าไปที่ http://ตามด้วย IP Zabbix /zabbix


ขอบคุณสำหรับความรู้ ลองติดตั้งแล้ว 30 นาทีเลยครับ และยังติดส่วนของ Zabbix server is running [NO] ผมปิด selinux แล้วก็ไม่ทำงานรบกวนแนะนำเพิ่มเติมด้วยครับ ขอบคุณครับ
Allow Port on Firewall หรือยัง
ได้แล้วครับ ขอบคุณมากครับ
ขอสอบถามนิดนึงครับ ผมได้ติดตั้ง zabbix 5.0 บน centos 8 และผมได้ทำการทำตามข้อด้านบนจนกระทั่ง zabbix-server: running แล้วครับ แต่ผมเปิดหน้า frontend ที่เป็นหน้าเว็บไม่ขึ้นครับ ขอคำแนะนำเพิ่มเติมหน่อยครับ ขอบคุณครับ